Read More ->>
Friday, December 13, 2019
Information about the Outlook AutoComplete list
https://support.microsoft.com/en-gb/help/2199226/information-about-the-outlook-autocomplete-list
Wednesday, November 13, 2019
Friday, November 8, 2019
Fix USB Error Code 52 Windows cannot verify the digital signature
https://troubleshooter.xyz/wiki/fix-usb-error-code-52-windows-cannot-verify-the-digital-signature/
My favourite?


My favourite?
Method 4: Disable Driver Signature Enforcement
For Windows 10 user’s, interpret the
Windows booting process 3 times to boot into recovery mode or else you
could try the following:
1.Go to the Login screen where you see the above error message then click on Power button then hold Shift and click on Restart (while holding the shift button).
2.Make sure you don’t let go of the Shift button until you see the Advanced Recovery Options menu.
3.Now Navigate to the following in Advanced Recovery Options menu:
Troubleshoot > Advanced options > Startup settings > Restart
4.Once you click Restart your PC will
restart and you will see a blue screen with a list of options make sure
to press the number key next to the option which says “Disable driver signature enforcement.“
5.Now Windows will boot again and once logged into Windows press Windows Key + R then type devmgmt.msc and hit Enter to open Device Manager.
6.Right-click on the problematic device (which has a yellow exclamation mark next to it) and select Update Driver.
7.Select “Search automatically for updated driver software.“
8.Repeat the above process for every problematic device listed in Device Manager.
9.Reboot your PC to save changes and see if you’re able to Fix USB Error Code 52 Windows cannot verify the digital signature.
Read More ->>
Wednesday, September 25, 2019
Alexa Skills - YouTube
https://github.com/ndg63276/alexa-youtube
Setup Instructions
- Go to the Alexa Console (https://developer.amazon.com/alexa/console/ask)
- If you have not registered as an Amazon Developer then you will need to do so. Fill in your details and ensure you answer "NO" for "Do you plan to monetize apps by charging for apps or selling in-app items" and "Do you plan to monetize apps by displaying ads from the Amazon Mobile Ad Network or Mobile Associates?"
- Once you are logged into your account click "Create Skill" on the right hand side.
- Give your skill any name, eg "My YouTube Skill".
- Important Set the language to whatever your Echo device is set to. If you are not sure, go to the Alexa app, go to Settings, Device Settings, then click on your Echo device, and look under Language. If your Echo is set to English (UK), then the skill must be English (UK), other types of English will not work!
- Choose "Custom" as your model, and "Provision Your Own" as your method, then click "Create Skill". On the template page, choose "Start from scratch".
- On the left hand side, click "JSON Editor".
- Delete everything in the text box, and copy in the text from https://raw.githubusercontent.com/ndg63276/alexa-youtube/master/InteractionModel_en.json, (or use InteractionModel_fr.json, InteractionModel_it.json, InteractionModel_de.json, InteractionModel_es.json for French, Italian, German or Spanish)
- Click "Save Model" at the top.
- Click "Interfaces" in the menu on the left, and enable "Audio Player" and "Video App". Click "Save Interfaces".
- Click "Endpoint" in the menu on the left, and select "AWS Lambda ARN". Under "Default Region", put the ARN. You can get an ARN by sponsoring me on https://www.patreon.com/alexayoutube, or make your own using the instructions under "Deploying yourself", below. (If you would like to test the skill before sponsoring me, put arn:aws:lambda:eu-west-1:175548706300:function:YouTubeTest - but this will only play Gangnam Style.)
- Click "Save Endpoints"
- Click "Permissions", at the very bottom on the left.
- Turn on "Lists Read" and "Lists Write".
- Click "Custom" in the menu on the left.
- Click "Invocation" in the menu on the left.
- If you want to call the skill anything other than "youtube", change it here. Click "Save Model" if you change anything.
- Click "Build Model". This will take a minute, be patient. It should tell you if it succeeded.
- Important: At the top, click "Test". Where it says "Test is disabled for this skill", change the dropdown from "Off" to "Development".
Deploying yourself (optional)
https://github.com/ndg63276/alexa-youtube/wiki/Running-your-own-lambda-instance
https://www.slickremix.com/docs/get-api-key-for-youtube/
This page was created using the guide @tal9000v2 put together, big thanks to him.
First, get your Google API key, following instructions here.
Then, log into the AWS Console and go into Lambda. Choose your region as one of:
Then click Create Function. Select "Author From Scratch". Give your function a name. Probably something like "YouTube". Under Runtime, choose Python 2.7.
Under Permissions, click "Choose or Create an Execution Role", then "Create a new role with basic lambda permissions".
When it has done the creation, on the new screen, under "Add Triggers", click "Alexa Skills Kit". Down below select "Disable" on the Skill ID Verification.
Now you've got your basic Lambda Function setup. Will look like this.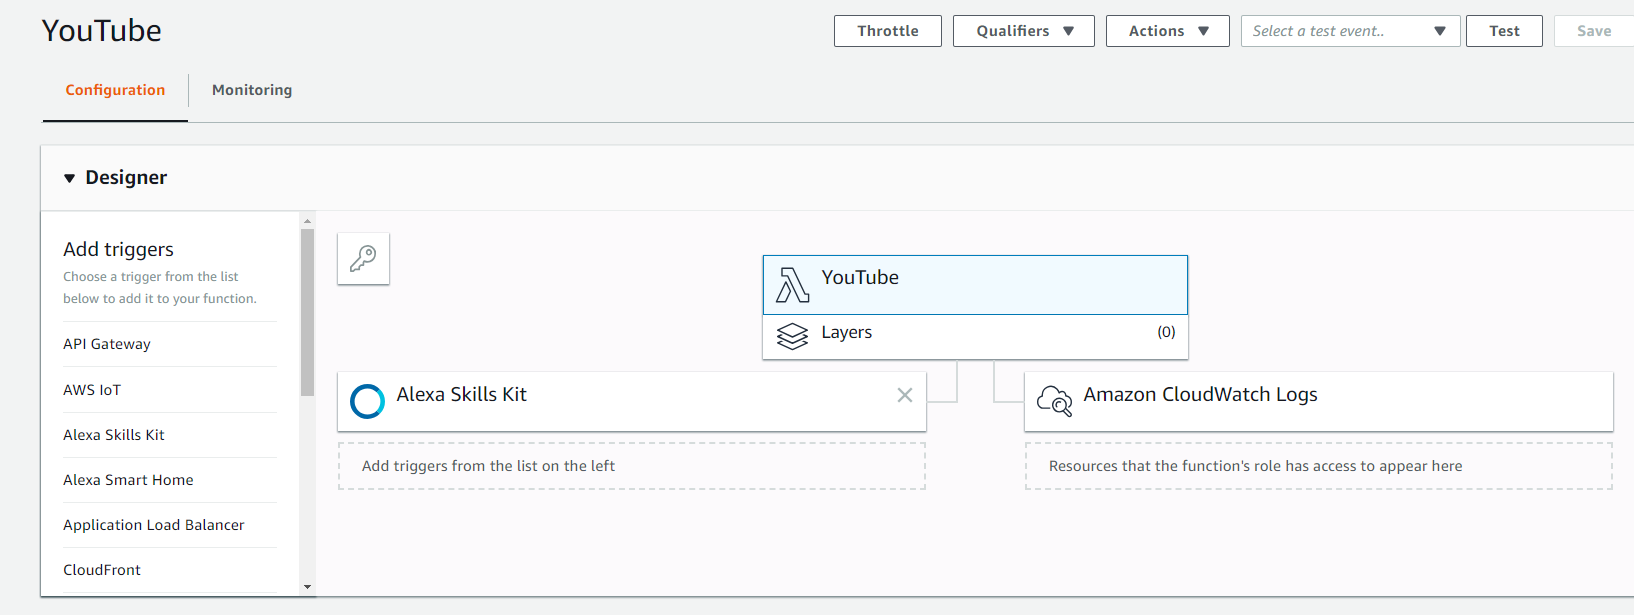
Now lets get the Function updated with @ndg63276 goods. Go and upload the lambda_function.zip which you can download from the repo here.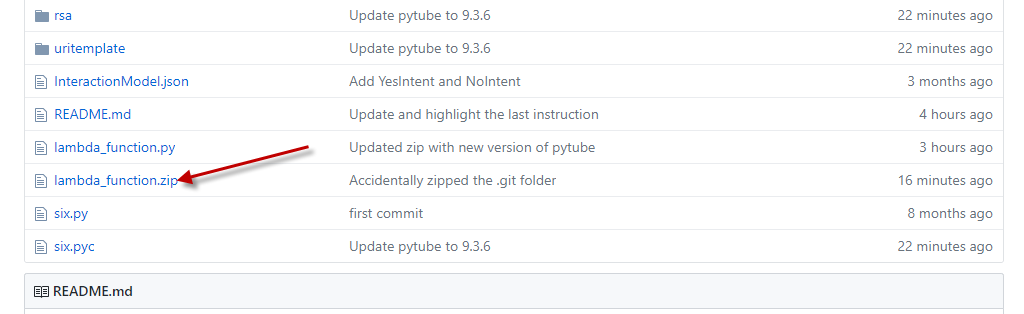
Download that zipfile locally. After you have it, let's upload that into your Lambda Function.
You need to add 1 environment variable. It should be called "DEVELOPER_KEY" and value should be your Google YouTube API Key.
Also, make sure you update your Memory utilization to 512MB with a timeout of 10 seconds.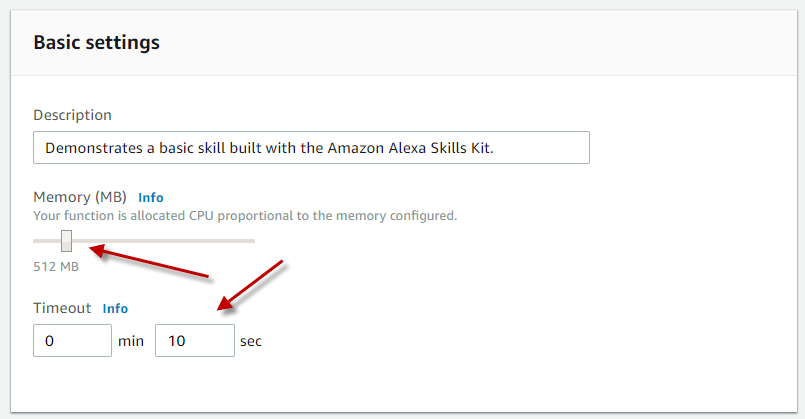
Hit SAVE to update your Function.
Now up at the Top of the screen you will notice your ARN #. Copy that.
Log into your Developer Console and go into your Alexa Skill and update the Endpoint using YOUR arn #.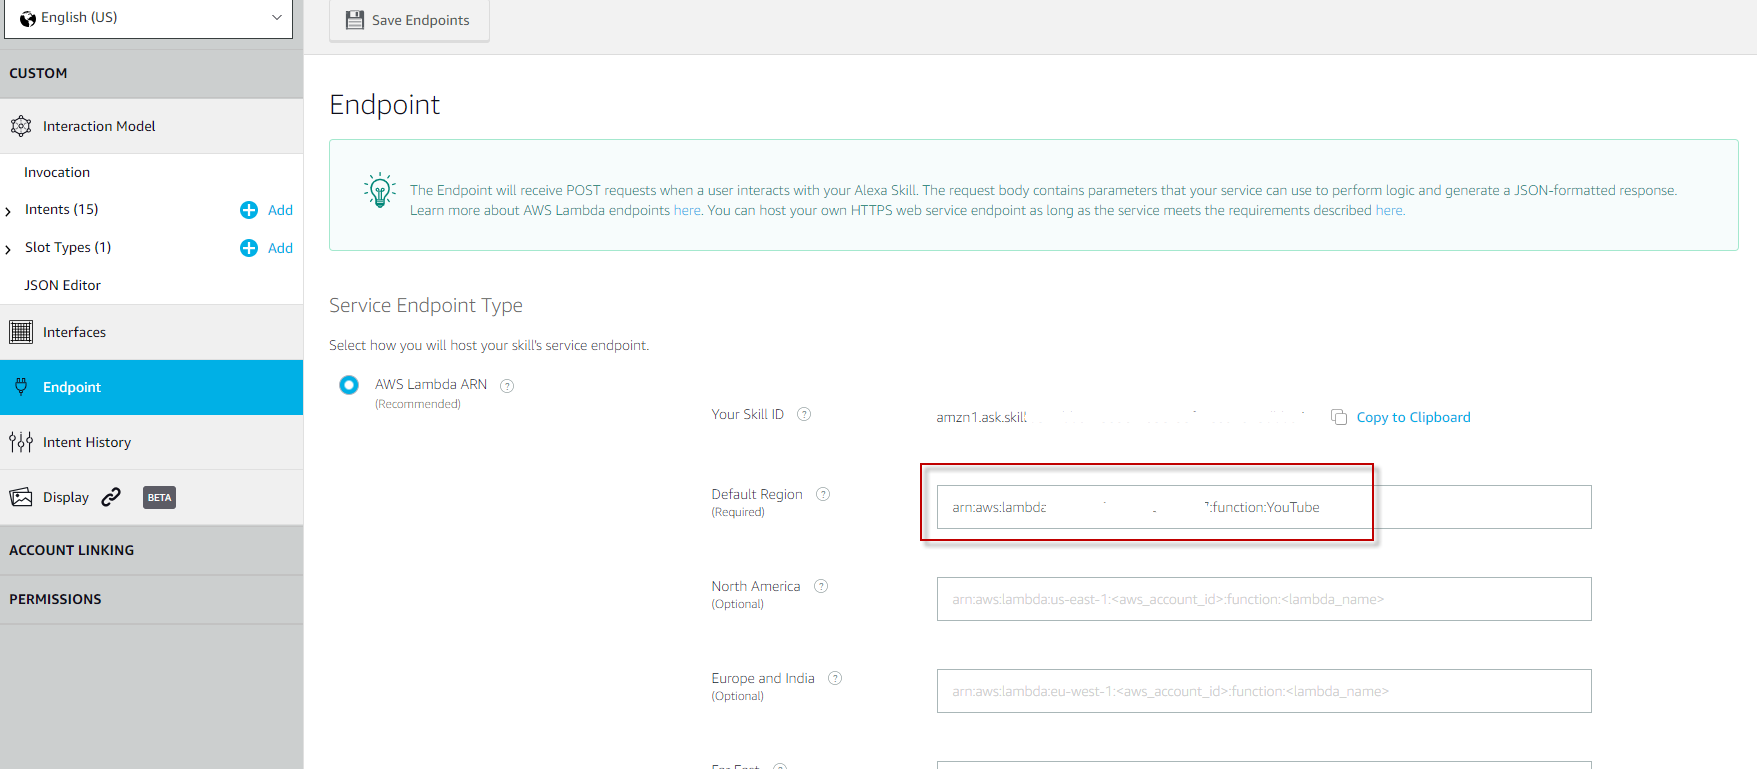
That should do it.
Now just give a quick test. In the Developer console, navigate to "Test" and try it out. Make sure you have the "Developer" mode enable. And test it out.
NOTE: The Emulator will NOT be able to actually play the audio in your browser. That is expected. But if you get a response back from your test, then it will be good on your Alexa enabled device.
Read More ->>
Monday, September 23, 2019
How to resolve Windows Server Backup not deleting old backups efficiently?
https://www.ubackup.com/windows-server/windows-server-backup-not-deleting-old-backups-8523.html
wbadmin delete systemstatebackup -keepVersions:3
wbadmin delete backup -keepVersions:3
wbadmin delete systemstatebackup -keepVersions:3
wbadmin delete backup -keepVersions:3
Read More ->>
Friday, June 7, 2019
Tuesday, April 30, 2019
Friday, March 15, 2019
How to test Office 365 SMTP server using Powershell
Everyone is familiar with sending a test email through an SMTP server using telnet. However Office 365 requires authenticating the user account and does not play fair the traditional way. Use the following information for sending a test email through Office 365 using Powershell.
3 Steps total
Powershell is available with Windows XP onwards.
$msolcred = get-credential

Send-MailMessage –From user@domain.com –To user@hotmail.com –Subject “Test Email” –Body “Test SMTP Relay Service” -SmtpServer smtp.office365.com -Credential $msolcred -UseSsl -Port 587
Dont forget to replace the required information with your info.
eg: From, To, Subject, Body
eg: From, To, Subject, Body
Also please note the From address must be the same email address associated with the provided user credentials.
Read More ->>
Thursday, March 7, 2019
Subscribe to:
Posts (Atom)